Distress Rainbow Using a Stencil

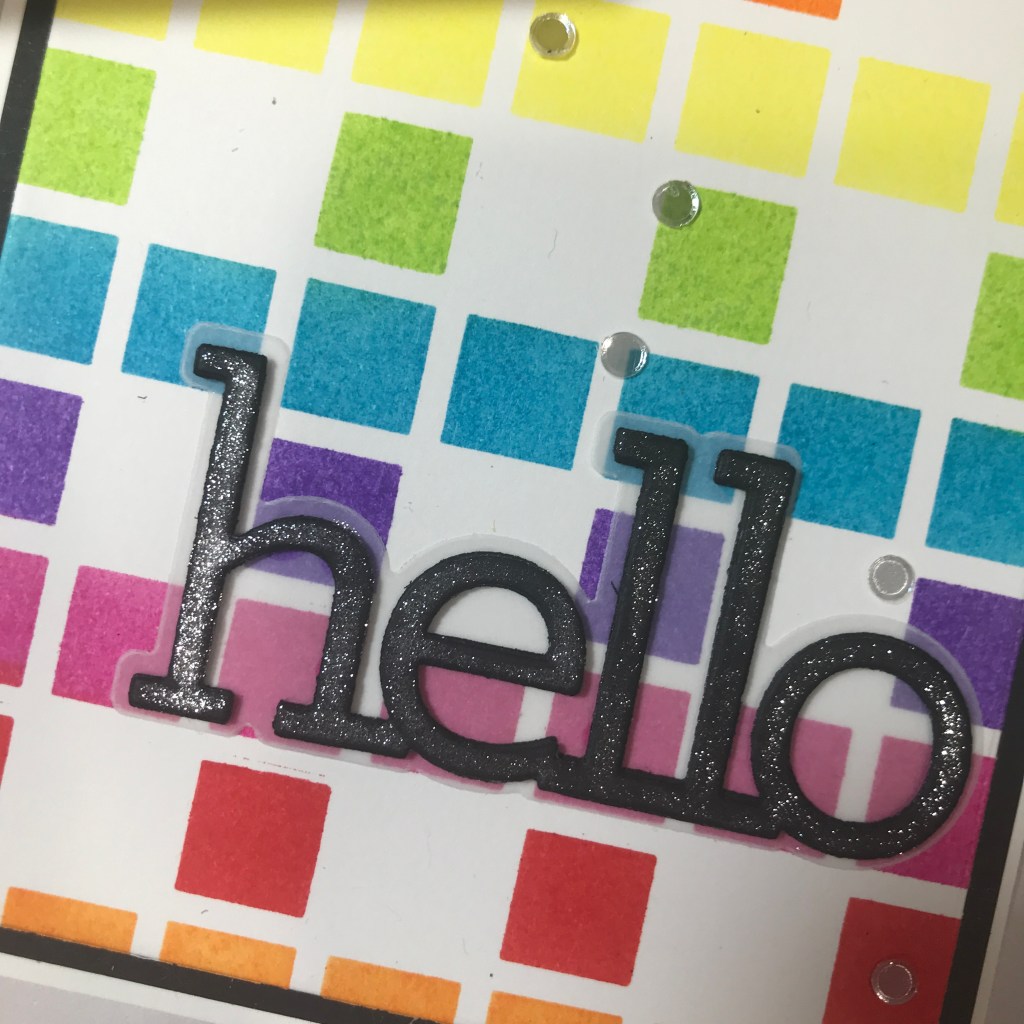
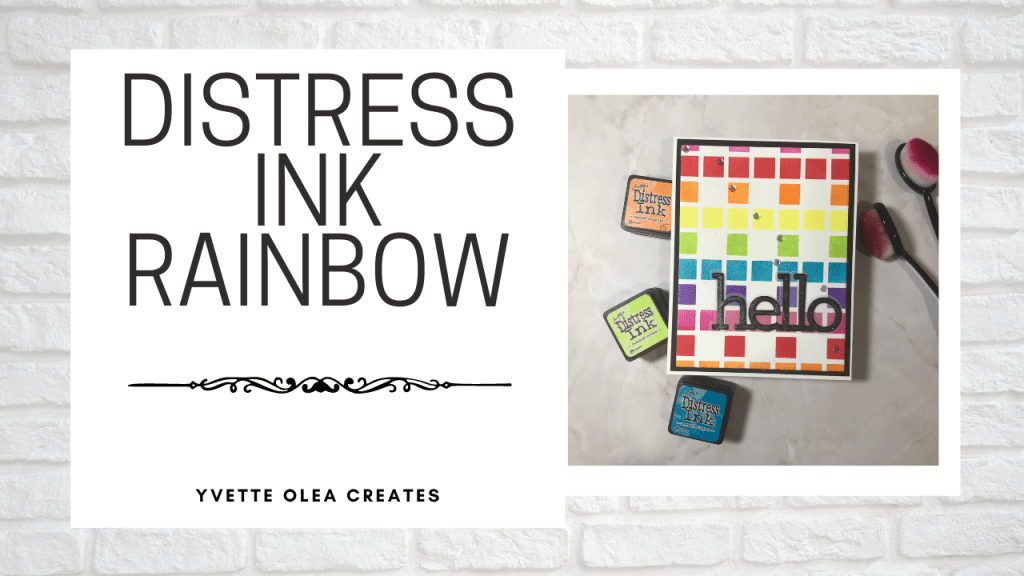
Hello my fellow creators. I’ve been super busy with helping my daughter move, celebrating birthdays and being sick so this is going to be a quick video and quick post. I thought it would be easy to make a rainbow card using my Distress Inks and a stencil, so that is exactly what I did. I used a stencil from my stash. This one came in a multi-pack I bought off of Amazon. It is not large enough to cover an A2 panel so I just ink blended and then shifted the stencil and ink blended some more. I didn’t want to take away from the beautiful rainbow of colors so I used a simple hello die by CZ Designs. I also added some sequins (maybe by Simon Says Stamp…not sure) and some sparkle to the sentiment. It took me 30 minutes to finish two cards. Not bad, if say so myself. I hope you enjoy this quick and easy card.

Visit my YouTube Channel and maybe even subscribe. Thanks for spending some of your time with me. Have a fun, safe and creative day!!

Please Subscribe to one of my social media accounts to see my latest creations (Instagram, Facebook, YouTube)!

Alice in Wonderland Paper

https://youtu.be/wOFW2LgYkyI

Hello my fellow creators. Silly me, I forgot to press record before I started making the cards so this video is more of a project share. This week I was able to use up yet another 6×6 paper pad. I used up what I had left of the Alice in Wonderland paper by Echo Park. I pulled in some card stock from my stash and several stamp sets by Simon Says Stamp. Making these cards helped me to add more general uplifting cards to my stash. I am definitely going to be sending out some of these cards to friends and family in the next week or two.

Thank you for supporting me and helping me grow as I continue my creative (and fun) journey. Thank you Alicia for always making such wonderful sketches that are super easy to follow. Thank you to all the other creators who continue to inspire and motivate me.

I hope you are able to visit my YouTube Channel and maybe even subscribe. Thanks for spending some of your time with me. Have a fun, safe and creative day!!

Please Subscribe to one of my social media accounts to see my latest creations (Instagram, Facebook, YouTube)!

Doodlebug “Under the Sea”

Hello to my fellow creators! I have been super busy at work this week so getting a chance to go in my craft room to play is always a welcome bit of relaxation for me. I pulled out another Doodlebug paper pad from my stash and used it all up. I was able to make 17 cards using the “Under the Sea” paper pad and card stock from my stash. I left most of the cards without a sentiment so I could add a specific sentiment when I needed a specific type of card (birthday, thank you, just because, etc.). I absolutely love the cheerful colors in this paper and I hope you will take the time to watch my video to see how I used up this paper pad.

Thank you for supporting me and helping me grow as I continue my creative (and fun) journey. Thank you Alicia for always making such wonderful sketches that are super easy to follow. Thank you to all the other creators who continue to inspire and motivate me.

I hope you are able to visit my YouTube Channel and maybe even subscribe. Thanks for spending some of your time with me. Have a fun, safe and creative day!!

Please Subscribe to one of my social media accounts to see my latest creations (Instagram, Facebook, YouTube)!

Show Us Your SheetLoad – April 2021

Hello to my fellow creators! I have decided to follow along with Alicia of Call me Crafty Al each month and do a video/blog post using her monthly SheetLoad of Cards sketches. I used this month’s sketch to make 30 (yes 30) spring themed mini-slimline cards. I pulled in some paper from a Michael’s hot buy paper pad (In Bloom) I had in my stash. I started by cutting all the patterned paper since I planned on doing this assembly line style. I then cut out my card bases and the sentiment strips. I used several stamp sets by Simon Says Stamp (Birthday Flowers, See You Soon, Wake Up & Make Up, Sympathy Greetings, Hello Sunshine, Amazing) and stamped all my sentiment strips ahead of time. I also brought in some enamel dots I found at Dollar Tree that matched the spring color theme perfectly. Now that I had all my elements ready to go, it was just a matter of assembling all the cards. I really liked how they turned out and will be sending some out to family and friends soon.

Alicia’s monthly sketches are available for download to her subscribers so go over to her channel (https://www.youtube.com/callmecraftyal) and subscribe for some creative fun.

#suysapr2021 #showusyoursheetload

Thank you for supporting me and helping me grow as I continue my creative (and fun) journey. Thank you Alicia for always making such wonderful sketches that are super easy to follow. Thank you to all the other creators who continue to inspire and motivate me.

I hope you are able to visit my YouTube Channel and maybe even subscribe. Thanks for spending some of your time with me. Have a fun, safe and creative day!!

Please Subscribe to one of my social media accounts to see my latest creations (Instagram, Facebook, YouTube)!

Using Nuvo Shimmer Powders & A Stencil

Hello my fellow creators! This week I chose to play with more items from my stash. I used Nuvo Shimmer Powders and the Simon Says Stamp Daisy Stencil to create several cards. I posted a picture of the first card I made on my Instagram account a week or so ago and got some requests to do a video on the process so here it is.

I grabbed some Masters Touch Water Color Paper from my stash to make these cards. I began by spraying some Pixie Spray on the stencil to make sure it stayed secure on the water color paper. Once the stencil was secure, I added some of the shimmer powders to different areas of the stencil. I then sprayed the powders using some water mixed with Perfect Pearls powder. This activated the Nuvo Shimmer Powder. I cleaned up some of the overspray using a rag and then removed the stencil. Each of the panels turned out so differently depending on how much shimmer powder I used, how much water I sprayed and what I used to soak up the excess. I think each of the panels turned out beautifully. Once the panels were dry, I stamped the “Hello Friend” sentiment from the “Freestyle Flowers” stamp set by Simon Says Stamp. I then used foam tape on the back of the panel (to give it some dimension) and added it to a black mat and then to the card base. Water colors are always so unpredictable, but so pretty. I’m glad I decided to play with these items from my stash. I think I may start to use water colors a bit more.

Thank you for continuing to support me and help me grow as I continue my creative journey. I am constantly inspired by so many other creators and am grateful to them for continuing to inspire and motivate me.

I hope you are able to visit my YouTube Channel and maybe even subscribe. Thanks for spending some of your time with me. Have a fun, safe and creative day!!

Please Subscribe to one of my social media accounts to see my latest creations (Instagram, Facebook, YouTube)!

Spring/Easter Cards

Hello my fellow creators! It is hard to believe that Spring is here and Easter is just around the corner. I look forward to each and every holiday because of all the fun I have with my kids and grandkids. I always make sure the Easter Bunny makes a trip to my house for some extra fun and goodies. This year, I made some small 3×3 cards to add to the Easter goodies for my grandchildren (I have eight). I used small scraps of Doodlebug Spring and Easter themed papers.

Using up my paper pads and scraps of paper is one of my crafty goals for 2021, so I am constantly pulling out partially used paper pads in order to meet that goal while crafting. This week, I was able to use up most of the tiny strips of paper and that makes me smile. I like that I can create some cute cards that will bring smiles to others. I hope you are all able to enjoy Spring and Easter (if you celebrate).

Thank you for continuing to support me and help me grow as I continue my creative journey. I am constantly inspired by so many other creators and am grateful to them for continuing to inspire and motivate me.

I hope you are able to visit my YouTube Channel and maybe even subscribe. Thanks for spending some of your time with me. Have a fun, safe and creative day!!

Please Subscribe to one of my social media accounts to see my latest creations (Instagram, Facebook, YouTube)!

School Themed Cards Using Doodlebug Papers

Hello my fellow creators! This was a very busy week. I had four videos to get recorded and edited as I am participating in three different hops this week. I have to admit, although I had fun making the cards and the videos, it was a lot of work to get four done in one weekend.

For my weekly video I decided to pull out some more Doodlebug paper from my huge stash of Doodlebug cuteness. I thought I should make some school themed cards in preparation for Day of the Teacher in May. I was able to make five cards using up what I had left of the “School Days” paper pad as well as the coordinating “Odds & Ends” and “Chit Chat” ephemera. I used up most of the paper but have lots of ephemera left. I’m sure I will find a way to use it up though.

Thank you for continuing to support me and help me grow as I continue my creative journey. I am constantly inspired by so many other creators and am grateful to them for continuing to inspire and motivate me.

I hope you are able to visit my YouTube Channel and maybe even subscribe. Thanks for spending some of your time with me. Have a fun, safe and creative day!!

Please Subscribe to one of my social media accounts to see my latest creations (Instagram, Facebook, YouTube)!

Colorful Birthday Cards

Hello my fellow creators! Thank you for coming back to see what I created this week. Today I am pulled out some patterned paper I had in my stash (Honey Bee Stamps – Over the Rainbow).

I used up all the paper from this paper pad and was able to create nine cards to add to my stash. I pulled in the Sweet Birthday stamp set by Simon Says Stamp. I stamped multiple images and heat embossed them using Simon Say Stamp Fine Detail Embossing Powder. I then colored several of the images using my Zig Brush Markers.

I also pulled in some Doodlebug stickers I had in my stash. The colorful papers really made these cards bright and cheery. They are perfect for my grandchildren (I have eight now).

Thank you for continuing to support me and help me grow as I continue my creative journey. I am constantly inspired by so many other creators and am grateful to them for continuing to inspire and motivate me.

I hope you are able to visit my YouTube Channel and maybe even subscribe. Thanks for spending some of your time with me. Have a fun, safe and creative day!!

Please Subscribe to one of my social media accounts to see my latest creations (Instagram, Facebook, YouTube)!

Summer Cards

Hello my fellow creators! I am so glad you have stopped by to take a look at what I created this week. Today I am playing with new to me Gina K Designs dies (Master Layouts 1 & 2). I made three summer themed cards using the dies and some colorful “Fun in the Sun” Doodlebug paper from my stash.

For my first card, I chose paper that had cacti as the background image. I used dies from both Master Layout 1 and Master Layout 2. I die cut the paper using my Gemini and a new self healing mat I purchased on Amazon (it actually worked great with a metal shim). Once I had my papers cut, I stamped and colored an image from the “Cuddly Cacti” stamp set by Simon Says Stamp. I also used a sentiment from this stamp set. The plan was to make one card for this week’s video, but once I finished the first one, I decided to make a couple more.

For my second and third cards, I did the die cutting off camera and assembled them on camera in order to avoid making the video too long. As usual, Doodlebug papers and stickers make any card simply adorable. I really enjoyed making these cards and hope you enjoyed watching my process.

Thank you for supporting me and helping me grow as I continue my creative journey. I am constantly inspired by so many other creators and am grateful to them for continuing to inspire and motivate me.

I hope you are able to visit my YouTube Channel and maybe even subscribe. Thanks for spending some of your time with me. Have a fun, safe and creative day!!

Please Subscribe to one of my social media accounts to see my latest creations (Instagram, Facebook, YouTube)!

Show Us Your Sheetload – March 2021

Hello to my fellow creators! I have decided to follow along with Alicia of Call me Crafty Al each month and do a video/blog post using her monthly Sheetload of Cards sketches. I used this month’s sketch to make more Christmas cards for my annual donation. I pulled in some paper from a Michael’s hot buy paper pad (Name here) I had in my stash. I used some embossed brown card stock (Recollections) for the mat and some cream heavy card stock for the bases. Once I had my papers selected, I went ahead and cut and sorted all the paper. I used some cut-aparts from the paper pad as my sentiment/images on the cards. I didn’t follow the sketch exactly. I went ahead and added a mat layer using the same paper I used for the strip (I did not use a scalloped edge). I also omitted the embellishment next to the sentiment/image. As you can tell, I used a square sentiment/image instead of the circle. I took a lot of liberties with this month’s sketch, but I like how the cards turned out. This took me a little over an hour to complete, which is perfect for getting a lot of cards done quickly.

Alicia’s monthly sketches are available for download to her subscribers so go over to her channel (https://www.youtube.com/callmecraftyal) and subscribe for some creative fun.

#suysmar2021 #showusyoursheetload

Thank you for supporting me and helping me grow as I continue my creative (and fun) journey. Thank you Alicia for always making such wonderful sketches that are super easy to follow. Thank you to all the other creators who continue to inspire and motivate me.

I hope you are able to visit my YouTube Channel and maybe even subscribe. Thanks for spending some of your time with me. Have a fun, safe and creative day!!

Please Subscribe to one of my social media accounts to see my latest creations (Instagram, Facebook, YouTube)!